Colonial Craft: Corn Husk Dolls

Corn Husk Dolls were a toy for Native American Indian children.  When the settlers from Europe came to the New World, they began making them as well.  Corn Husk Dolls typically are made without faces but they can be made with pants or a dress. 


I found directions for making Corn Husk Dolls at Native American Life Living Art.  You can dry your own corn leaves or husks but I was able to find a big bag of clean, dry husks at our local store.  I soaked them in water before we used them to make them soft and easier to work with.


The corn husks have a wide end and then they taper down to a pointed end.  Gather four corn husks together, all lying in the same direction.  Tie them together near the end that has the wider ends.  You can use twine or yarn, whatever you have on hand.


Use scissors to round over the wide end where you just tied them together.  Now, take the pieces of husk at the more narrow end and fold them over the tie you just made and then tie them in place.  This makes the doll's head.


Take another piece of corn husk and roll it up.  These will be the doll's arms.


Tie both ends tightly to form the hands and then slide the piece into the corn husk body, just below the head.


Tie the corn husks together again just below the arms to form the doll's waist.


Drape a piece of corn husk around the doll's shoulders in a criss-cross pattern.  Then gather four corn husks around the doll's waist and tie on to make a skirt.  Trim the skirt to even the bottom.


Rachel loved making these corn husk dolls.  She made several of them and she had them play together as they talked to each other and acted out scenes of colonial times.

Garden Yoga Cards for Kids {Review}


Rachel has been enjoying learning about yoga with these adorable Garden Yoga Cards for Kids.  The cards teach children various yoga poses by comparing the pose to something they might find in a garden like a frog, cricket, or caterpillar.

The cards come in a downloadable format so I printed four cards to a page, laminated the page, cut out the cards, and put them on a ring to help my daughter flip through them.

Rachel likes to put a towel on the ground in our back yard and work through the yoga poses. Here she is looking at the Squat Pose which is like a Frog.


She is 8 years old and had no experience with yoga before trying these cards.  She loves the connection of the poses with the garden.


The Garden Yoga Cards for Kids includes 20 yoga pose cards and 20 garden cards in a downloadable format. 


We homeschool so Rachel likes to use her Garden Yoga Cards for Kids during her school breaks.  I have noticed that the stretches and the time outdoors helps her be more relaxed and focused when she sits back down for school.


The Garden Yoga Cards may be purchased at Kids Yoga Stories for $9.95 for a digital download.  There is also an amazing book that just happens to be titled Rachel's Day in the Garden that tells a cute story using some of the Garden Yoga poses.

Celebrating Manhood - A Rite of Passage Guide {Review}

As a reviewer for the Home School Review Crew I was given the opportunity to review some products from the Home School Adventure Co.  This is wonderful company that was founded by a homeschool family.  Their mission is to help "other families cultivate and defend a biblical worldview"
Home School Adventure Company

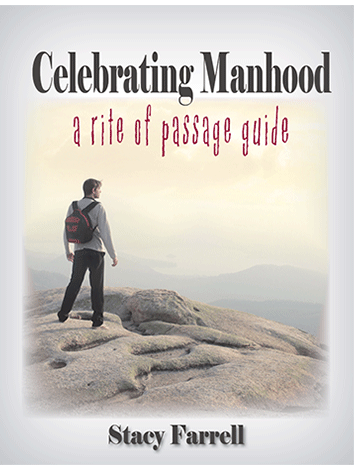
I chose to review their product, Celebrating Manhood: a rite of passage guide.  It was written by Stacy Farrell as a way to help her sons celebrate their growth into men of integrity.

Celebrating Manhood a Rite of Passage Guide

My husband didn't have any kind of rite of passage like this when he was growing up.  Sadly, the idea of a rite of passage is something that our modern culture seems to have lost.  Instead childhood just seems to go on and on.  There doesn't seem to be much expectation for teenagers and young adults to be productive with their time and to think outside of themselves so they end up spending their days glued to their cell phones or playing video games. 

However, in the past, there were higher expectations for young people.  They were taught skills and values by their older generations.  They were given more responsibility at younger ages and they were expected to behave maturely and contribute to their family and society as a whole.  We need to get back to that attitude that young people can make a difference and a worthy contribution to the world around them by learning from their elders and then going out and applying themselves.  

A rite of passage celebration is the perfect way for a young man to realize what is expected of him as he enters into young adulthood.  It is his time to grow into his potential and be all that God has planned for him.  


Stacy Farrell has written Celebrating Manhood: a rite of passage guide to help plan a rite of passage for her growing sons.  It is a great resource for parents who have not attended such an event because she has already planned it all out for you.  She includes a blueprint for the celebration and she even includes a template for you to use to make the invitations.  The packet includes an agenda which covers inviting a few men who have been important in the young man's life, food, activities, blessings, and question cards.  

The Question Cards come as 3 different sets of printable cards to be used during the celebration.  The topics for the 3 sets are "If Only I Had Known...", "I Remember When...", and "What I Value and Respect...".  The men at the celebration take turns pulling a card from a deck and giving a meaningful answer.    


Here are a few examples of questions in the cards:

  • What helps you deal with the inevitable disappointments you encounter in life?
  • What is one of the best experiences you had with your dad?
  • If you could change one thing about the world, what would it be?
You can purchase the digital download for $14.95 or order a print version for $18.95.  

I think a rite of passage celebration is a wonderful milestone in a young man's life and it is an opportunity that should not be missed.  I'm grateful for the ideas and resources that are included in Celebrating Manhood.  However, for the price, I would like to see a little bit more information about the importance of the ceremony in a young man's life and perhaps a few more specifics included with the ideas for the agenda.  Overall, I think it is a great product and I would definitely recommend it to parents of boys.

If you would like to check out some more reviews from the Home School Review Crew about this product and others from the Home School Adventure Co., please click on the banner below:

Resources with a Biblical Worldview{Home School Adventure Co. Reviews}

Crew Disclaimer

Bluebonnets at Lake Grapevine

The weather has been beautiful and the temperature is perfect.  As I picked the kids up from their theater class today, I looked up at this tree and noticed the green leaves, blue sky, and rays of sun. 


That was about all I needed to decide that we needed an impromptu nature hike.  It's about time for bluebonnets to be in bloom so I went over to a little spot on Lake Grapevine to see what it looks like.  One year we came out to take pictures and it was completely flooded.  Some years it is overwhelming with blooms.  Other years it isn't very impressive.  This year probably falls somewhere it the middle.


There are different varieties of bluebonnets but they are all in the genus Lupinus.  Here in Texas, we find these beauties called Lupinus texensis.


The bluebonnet is the state flower of Texas.  While there are rumors that it is against the law to pick bluebonnets, they simply aren't true.  


I love this spot because there is such a contrast between the lush bluebonnets and the dry rocky beach. It makes for unusual pictures and it is just more fun to explore.


In some places it is like God laid down a carpet of bluebonnets!


Of course, we never know what other interesting things we will find here.  Nicholas found this cool green beetle scurrying over the rocks.


We found lots of these burs.  Unfortunately, many of them were stuck to my pants and shirt!


Of course, when near a lake, one must get wet.  Amazingly, the kids stayed pretty dry this time.  They usually get soaked when water is nearby!


Nicholas found three Devil's Toenail fossils, aka gryphaea.


The terrain is rocky and can be rough to walk on in spots so the kids found sticks to use as walking staffs.


Rachel found this cool rock that has an impression in it.  We thought at first that it was an ammonite impression but it could be a regular shell.  Either way, it was cool to see.


A little later, Rachel called to us to see what she found.  A GIANT Devil's toenail!  I've never seen one that big!


I love that my kids have fun exploring and hunting for unusual treasures.  


On our way out, Nicholas found what we think may be two owl pellets.  


He picked one apart and didn't find much inside.  I'm still not 100% sure that these were owl pellets but they might be since they really didn't look like scat.

Creating a Masterpiece {Review}

We have been using a wonderful homeschool art curriculum called Creating a Masterpiece.  It offers an online art program taught through videos by art teacher, Sharon Hofer.  This is really a great product and I'm so excited that we had a chance to review it.
Creating a Masterpiece

It is an online program so you are purchasing a subscription.  We reviewed the Monthly Plan that gives us access to all of the projects for the month that we have paid.  There is also an Annual Plan and you can purchase Individual Levels.


The art projects are divided into levels - Beginner and then levels 1 to 5.  The Beginner projects are short with just one lesson and could probably be completed in about an hour.  The art projects for the other levels are broken into multiple lessons with each lesson taking approximately an hour to complete.  These more challenging art projects have about three to four lessons each.  I had planned to have my children complete a lesson every other day but honestly they enjoyed them so much that they kept going through more lessons on their own!

We started with a Level 2 project using oil pastels.  My kids both love animals so they wanted to create the panda bear.  I think they were especially intrigued that it was made on velour paper so it would be soft and fuzzy like touching a real bear.


They watched the videos and completely their preliminary drawing.


Ms. Hofer taught them to draw the bear by starting with basic shapes and then going back to add detail.  My kids did great with this.  Drawing a panda bear can seem like quite a challenge but the way the steps were laid out, my kids weren't intimidated at all.  


Next they transferred their panda bear to the velour paper.  Isn't he already adorable?


I was really impressed with how much my children enjoyed these art lessons.  They were excited to get started each day and they moved through the lessons on their own. 


Here are their finished panda bears.  They had a lot of fun creating him and they are so proud of the way this art project turned out.


Nicholas, age 12


Rachel, age 8


They also made a Level 4 project using copper tooling to make seahorses.  This one had some unusual supplies like copper sheets and liver of sulphur to create the patina.


I love teaching art to my kids but I really dislike having to run to the craft store all the time for supplies.  Plus if I'm unfamiliar with the supplies then I usually end up questioning if I've bought the right items, correct sizes, etc.  So I really appreciate the fact that with Creating a Masterpiece, not only is there a list of all of the supplies that you need but you can even click on a link to purchase supplies.  When you click to purchase supplies, you are taken to the Dick Blick art supply webpage where all of the supplies for your particular project are grouped together and you just click on which ones you want to add to your cart.   What an amazing partnership between these two great companies! I wasn't sure where to buy velour paper or liver of sulphur so I was glad to be able to order it through the website and know that I got just the right product.  It was quick and easy.

We reviewed the monthly plan which costs $39.99 per month and gives you access to all of the online art lessons which includes over 144 lessons and additional tips.  There are other options available though.  You can save some money by signing up for annual access for $349.  This is really a bargain because it is so much cheaper than a year of art classes for my two kids!  You can check out other membership options HERE.


Please check out some more reviews for Creating a Masterpieces from the Home School Review Crew by clicking on the banner below:

Creating Beautiful Art at Home {Creating A Masterpiece Reviews}

Crew Disclaimer

Spring Break 2017

We've had a fun week with our spring break staycation. I had at least one activity planned for each day and we invited friends to come along and share in the fun!  We started off Monday by seeing the LEGO Batman movie.  It was ok but there were parts in it that were oddly sappy for Batman.  I think he may need some therapy.

On Tuesday, we went ice skating at the Dr. Pepper Stars Center.


Nicholas has just recently started getting back into hockey.  He's still fast on the ice and good with a "hockey stop".  Check out this video:


He is especially impressive with his transition from forward skating to backwards skating.  He makes it look so easy!


Rachel tries hard to keep up with Nicholas on the ice. She is working on skating backwards.  I realized after watching this video below that she has her feet turned inward too much.  More practice needed.


On the way home, we stopped in Carrollton to visit our favorite rock shop, Nature's Gallery.  


Donald Slater is the owner and he is very knowledgeable about rocks, fossils, minerals, etc.  I love that he is always open to talking with my kids about things they find and he helps them identify what they have.


We met up with some friends who had never been to the shop and it was fun watching them discover all the cool stuff!

Nicholas wants this giant geode and its matching other half.


The girls were looking at natural copper.  It is really beautiful in its natural state. 


My kids were shopping with a $10 budget each so they had to shop the smaller items.  There were still plenty of choices for them though.


Nicholas got a small piece of Labradorite for Christmas but he found this giant one that he would love to have.  It's $100 though.


 I liked this giant Desert Rose (gypsum) but I have enough in my collection already.


On Wednesday, we went on a nature hike at the Arbor Hills Nature Preserve.  I have enough pictures from the hike that I decided to put them in their own post.  You can check it out HERE.

On Thursday, we went roller skating at Interskate.  They had a special for Spring Break - $4.00 per skater including skate rental.  Rachel tried inline skates for the first time.  She felt sassy in them.  Wait, she always acts sassy!


Nicholas was awesome and helped her get comfortable skating in them.


These two skated around together for quite a while just talking and laughing with each other. 

I just loved the rainbow colored roller skate themed carpet they have! 
On Friday, we went to Frontiers of Flight Museum in Dallas and then wrapped up the week with ice cream floats!  Check out that post HERE.